
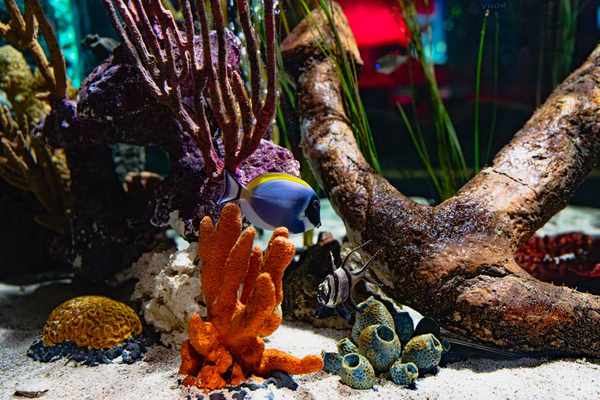
A saltwater aquarium brings the movement and colour of a marine habitat into your home, but the real achievement happens behind the scenes: stable water. Successful saltwater aquarium setup depends on salinity, filtration and preparation long before fish arrive.
You do not need every gadget in an aquarium shop. You need dependable equipment, marine tank basics and a routine you can maintain. The following steps explain how to build that foundation without rushing livestock into an unready tank.
Step 1: Choose the tank and its location
Very small tanks can change temperature and salinity quickly. A roughly 20–40-gallon aquarium is often a practical first fish-only setup because its greater water volume offers some protection against minor fluctuations.
Use a level, purpose-built stand capable of supporting water, glass, sand and rock. Keep the aquarium away from sunlight, heaters, draughts and household sprays. Leave access for maintenance, and arrange power cords with drip loops and protected electrical outlets.
Decide whether you want fish only or a reef containing corals. A reef adds requirements for lighting, water movement and chemistry, making a fish-only display a sensible place to learn.
Step 2: Assemble the essential equipment
A beginner marine aquarium setup needs biological filtration, circulation, temperature control and water testing. A suitable hang-on-back filter, canister or sump can provide filtration, while rock and biological media support microorganisms that process waste.
Add an adjustable heater, a separate thermometer and a powerhead to move water around the rockwork. Use a secure cover if your chosen fish may jump. Protein skimmers help remove organic waste and can be useful, but not every lightly stocked fish-only aquarium requires one.
Choose marine test kits for ammonia, nitrite, nitrate and pH, plus a calibrated refractometer to check salinity. Ordinary fish-only lighting can be modest; photosynthetic corals need properly selected reef lights. Buy for the animals you plan to keep rather than buying equipment simply because it is advertised as essential.
Step 3: Mix saltwater correctly
Use commercial marine aquarium salt, not table salt. Reverse-osmosis/deionized (RO/DI) water is a predictable starting point because tap water may contain minerals, nutrients or contaminants that complicate marine care.
Mix the salt into water in a clean, aquarium-safe container with circulation, following the manufacturer’s directions. Let it dissolve thoroughly and approach the aquarium’s temperature before measuring salinity. Many tropical marine systems target approximately 35 parts per thousand, near 1.025–1.026 specific gravity at typical aquarium temperatures. Verify the needs of your intended species.
Imagine filling a 30-gallon tank and finding its salinity is low. Adjust a separate batch gradually rather than dropping dry salt into the display. Once fish are present, rapid salinity changes can be stressful. Evaporated water leaves salt behind: top off with fresh RO/DI water, not saltwater.
Step 4: Arrange sand and rock with purpose
Some aquariums use a shallow layer of aquarium-safe sand; others have bare bottoms for easier cleaning. Choose according to your intended livestock and maintenance preferences. Provide rock structures with hiding places, open swimming space and room to clean the glass.
A live rock setup may start with responsibly sourced aquacultured rock or dry rock that becomes colonized during cycling. Live rock can introduce beneficial life, but it can also bring hitchhikers or produce ammonia after transport-related die-off. Inspect it and never assume that live rock makes cycling unnecessary.
Build rockwork securely, avoiding unstable stacks resting on shifting sand. Keep flow around the structures so waste does not collect in inaccessible pockets.
Step 5: Complete the nitrogen cycle without fish
Saltwater tank cycling establishes microorganisms that convert ammonia from waste into nitrite and then nitrate. Ammonia is dangerous to fish; nitrate is less immediately toxic but still requires monitoring and management.
Run the heater, filter and circulation continuously. Add a measured aquarium-grade ammonia source according to its directions, without introducing fish. Test ammonia, nitrite and nitrate regularly and keep a dated record. Beneficial bacteria need time to colonize filters, rock and other surfaces.
Cycling commonly takes several weeks and can take six to eight weeks or longer. Do not use the calendar as proof of readiness. One useful check is that your filter can process a controlled ammonia dose so ammonia and nitrite both return to undetectable readings within approximately 24 hours. Follow your cycling product’s procedure when confirming the result.
Before stocking, make a partial water change if nitrate is elevated, matching the replacement water’s salinity and temperature. For more detail, explore our beginner’s aquarium cycling guide.
Step 6: Check water quality and keep it steady
Many commonly kept tropical marine fish thrive around 24–26°C (75–79°F), although species requirements differ. Marine pH often lies around 8.0–8.4. Stable, appropriate conditions matter more than chasing a particular number with frequent chemical adjustments.
Check temperature and salinity regularly. Test ammonia and nitrite particularly closely during early stocking, and monitor nitrate and pH as part of maintenance. If fish breathe rapidly, stop eating or behave unusually, test the water before guessing at a treatment.
Use freshly mixed saltwater for water changes, but freshwater for evaporation top-offs. This distinction prevents salinity from creeping upward. Our aquarium water testing guide can help you interpret changing readings.
Step 7: Introduce compatible fish slowly
Research each species’ adult size, temperament, diet and swimming needs. A small fish in a shop may grow too large or become aggressive. Begin with a low stocking level and wait between additions while confirming the biological filter can handle the extra waste.
Quarantine new fish where practical to observe possible illness. Match temperature and salinity, follow suitable acclimation instructions and avoid pouring transport water into the display. Feed small portions, remove excess food and watch new arrivals closely during their first days.
Before purchasing tankmates, read our marine fish compatibility guide rather than relying on appearance or a shop label alone.
Make maintenance predictable
Daily equipment checks, freshwater top-offs, routine testing, glass cleaning and appropriate partial water changes are more valuable than constant tinkering. Clean mechanical filter material without unnecessarily destroying established biological media. Avoid adding several fish at once, and keep a plan for power interruptions.
Frequently asked questions
Can I use tap water in a saltwater aquarium?
Tap water quality varies. Even treated supplies may contain unwanted nutrients or metals. RO/DI water provides greater consistency, especially in reef systems.
How long must a new saltwater tank cycle?
Several weeks is common, but testing determines readiness. Add fish only when the established filter reliably processes ammonia and nitrite, not simply because a certain number of days has passed.
Is live rock essential?
No. Appropriate dry rock and filtration can develop biological activity through cycling. Live rock may help seed a system, but it still requires careful observation.
What mistake should beginners avoid most?
Adding fish before the nitrogen cycle is established can create dangerous ammonia levels. Patient cycling and gradual stocking protect livestock and make problems easier to diagnose.
A better start makes a better aquarium
Plan the layout, prepare stable saltwater, build effective filtration and let the tank mature before stocking it. A methodical saltwater aquarium setup is less dramatic than adding fish immediately, but it creates a safer home for marine life and a more enjoyable aquarium to maintain.